I put my first blog post up about my P3Steel build. I’m calling it version 2.5.1 in reference to design from 2.5. Here is a list of the parts and proteins I used in the build. It’s not comprehensive, I don’t have every screw and nut but hopefully it will be useful summary. This is my first attempt at a list I will try to update it later to fill in any missing gaps.
I ordered many of the parts from Aliexpress to save money. Quality from there was also pretty good.
Frame
My P3Steel V. 2.5.1 frame. Here is a link to it. I made changes from V.2.5 using SolidWorks 2015 V. 5.
General Components and Electronics
8mm Smooth Rods – I got 6 of them from aliexpress for $32. You have to request the seller cut them correct lengths. The lengths needed are
2x @ 385mm
2x @ 350mm
2x @ 330mm
LM8UU Bearings – 12 needed in total. Over order and use two suppliers because there are manufacturing variances on cheap bearings. I ordered these $8 for 12 of them and these $6 for 12 of them and these. They need to slide over the smooth rods without resistance but shouldn’t be lose.
608zz Bearings – They cost $10 per piece at ace hardware or you can get 10 of them for $6 off amazon.com .
GT2 Belts and Pullies – $4 from Aliexpress.
NEMA 17 Motors – 4 are need. They can be pricey. If you want 400 steps per rotation instead of 200 (which I went for they are a little more). I ordered 5 of them from aliexpress for $9 per motor. I used a file to put a flat surface on the round shafts. It was easier to do then I expected. Make sure to block the holes with silly puddy to keep the metal shavings out of the motors if you go this way.
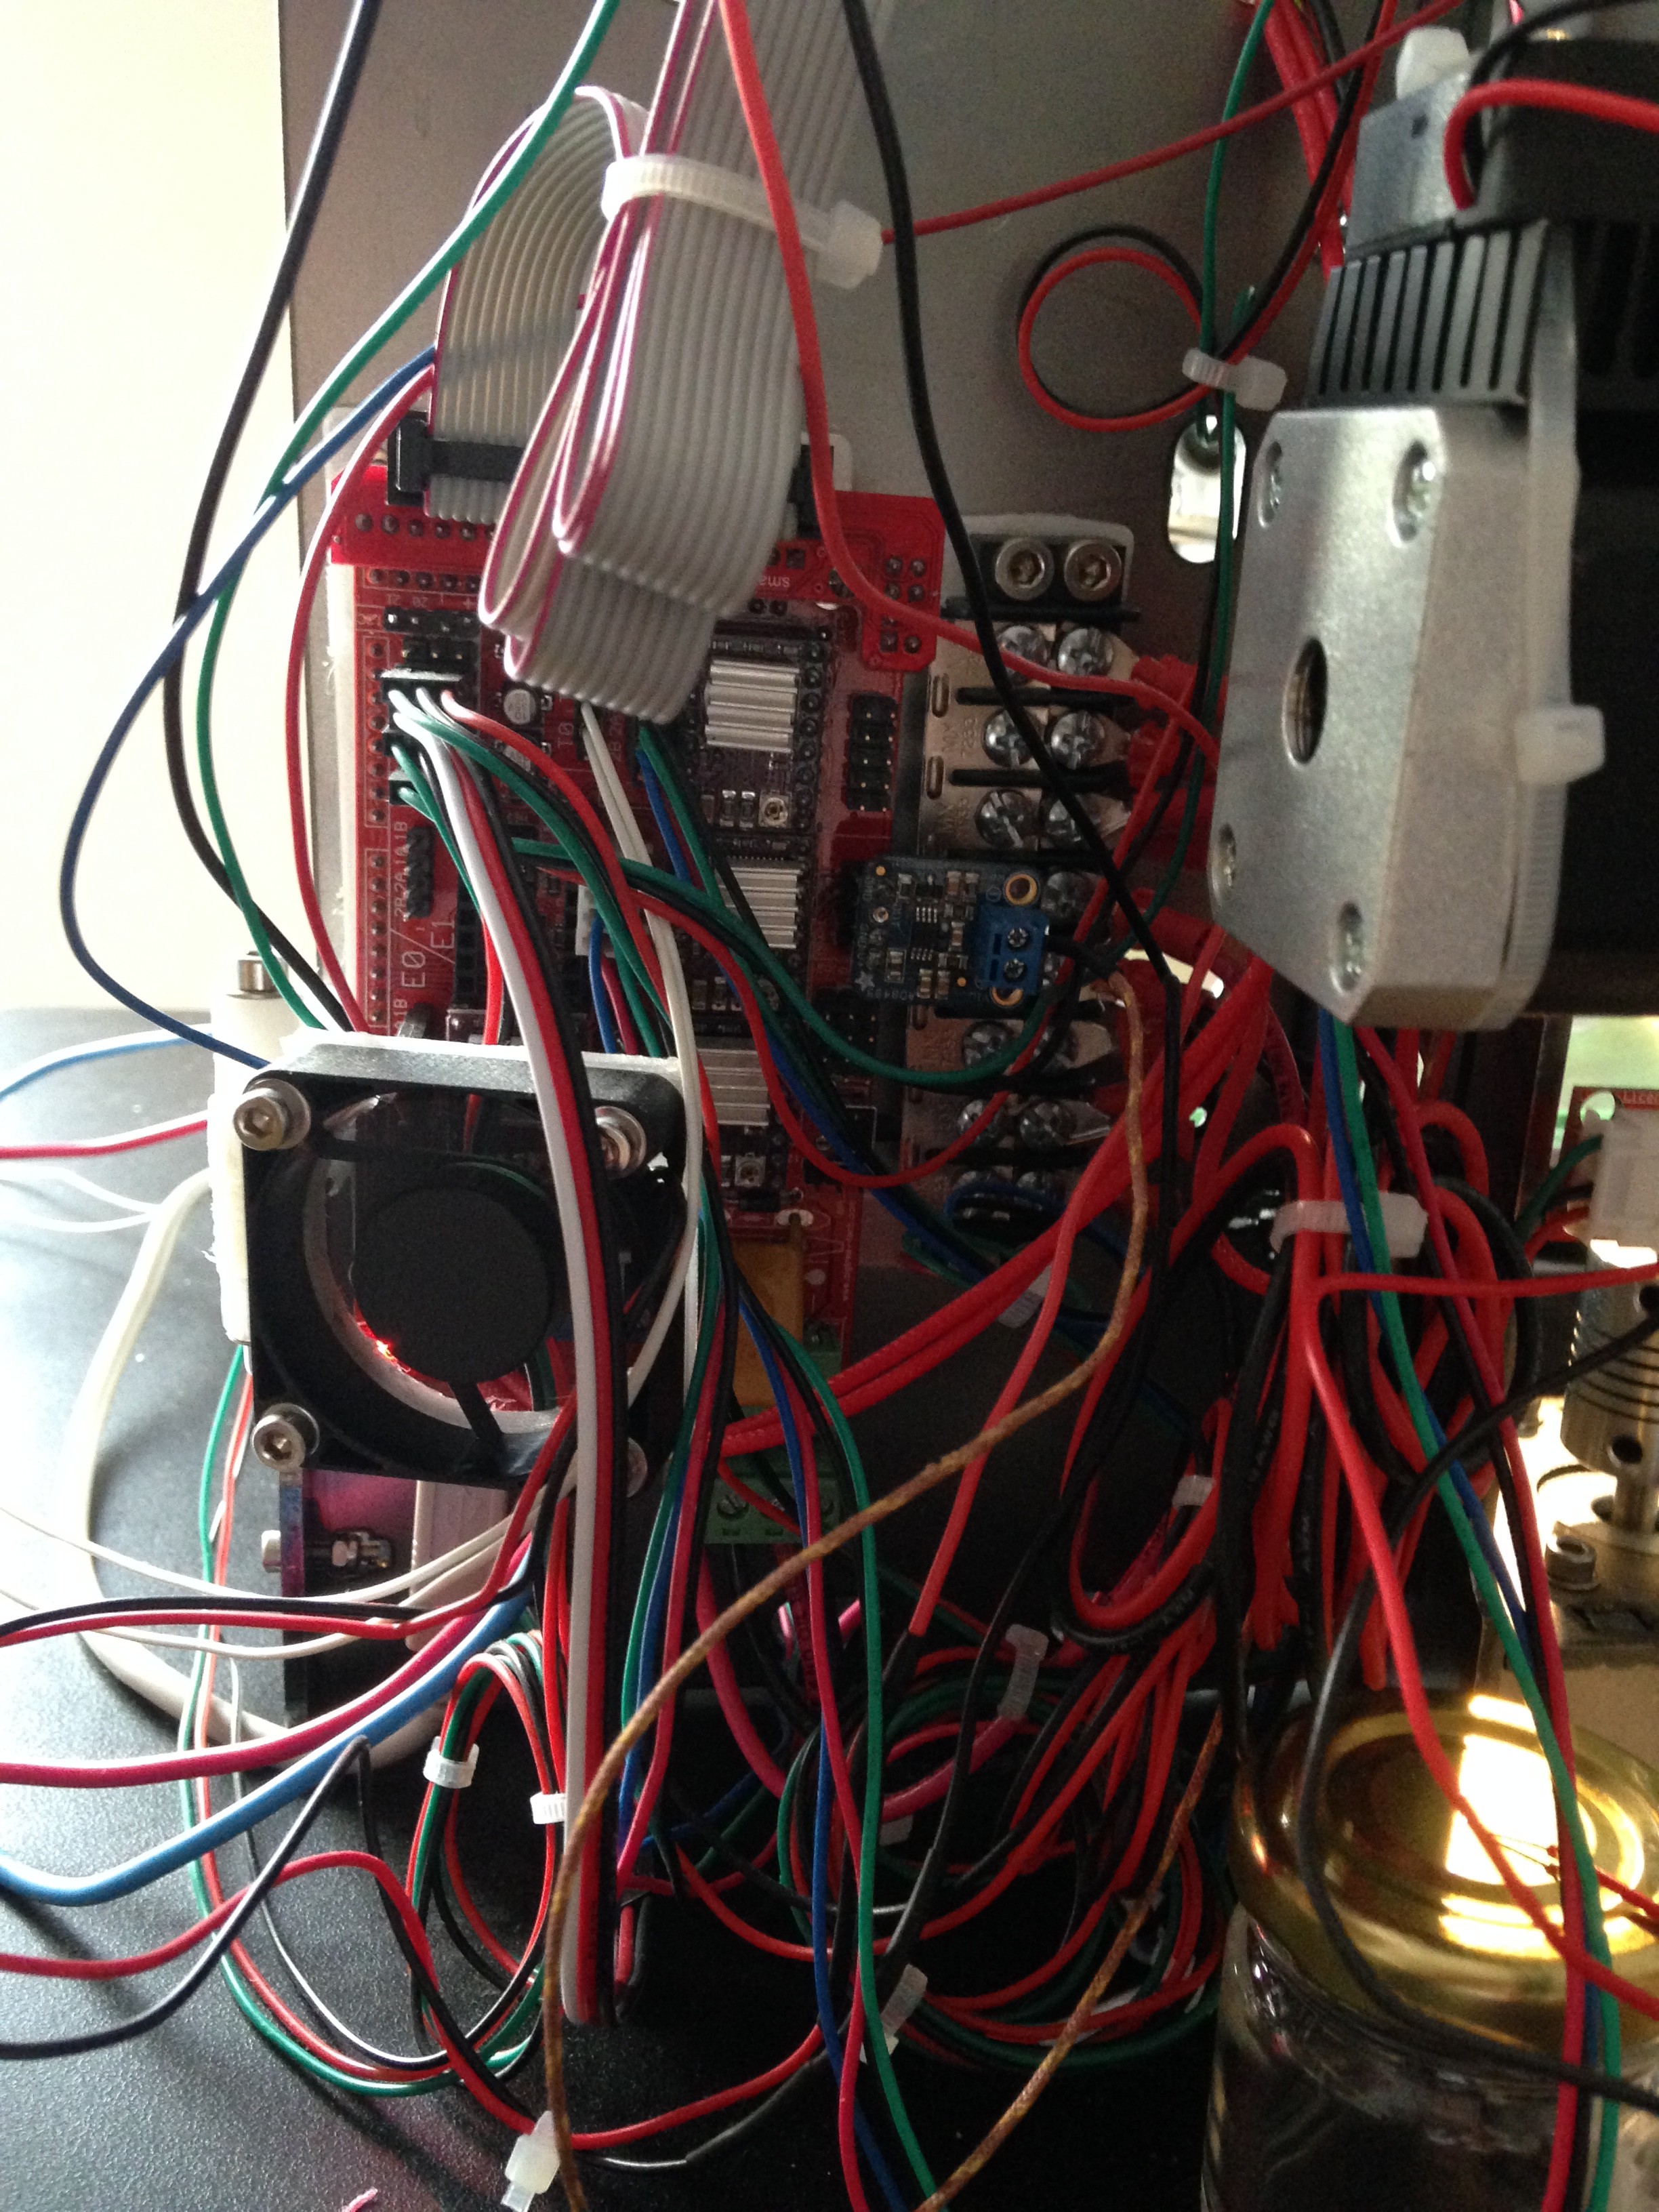
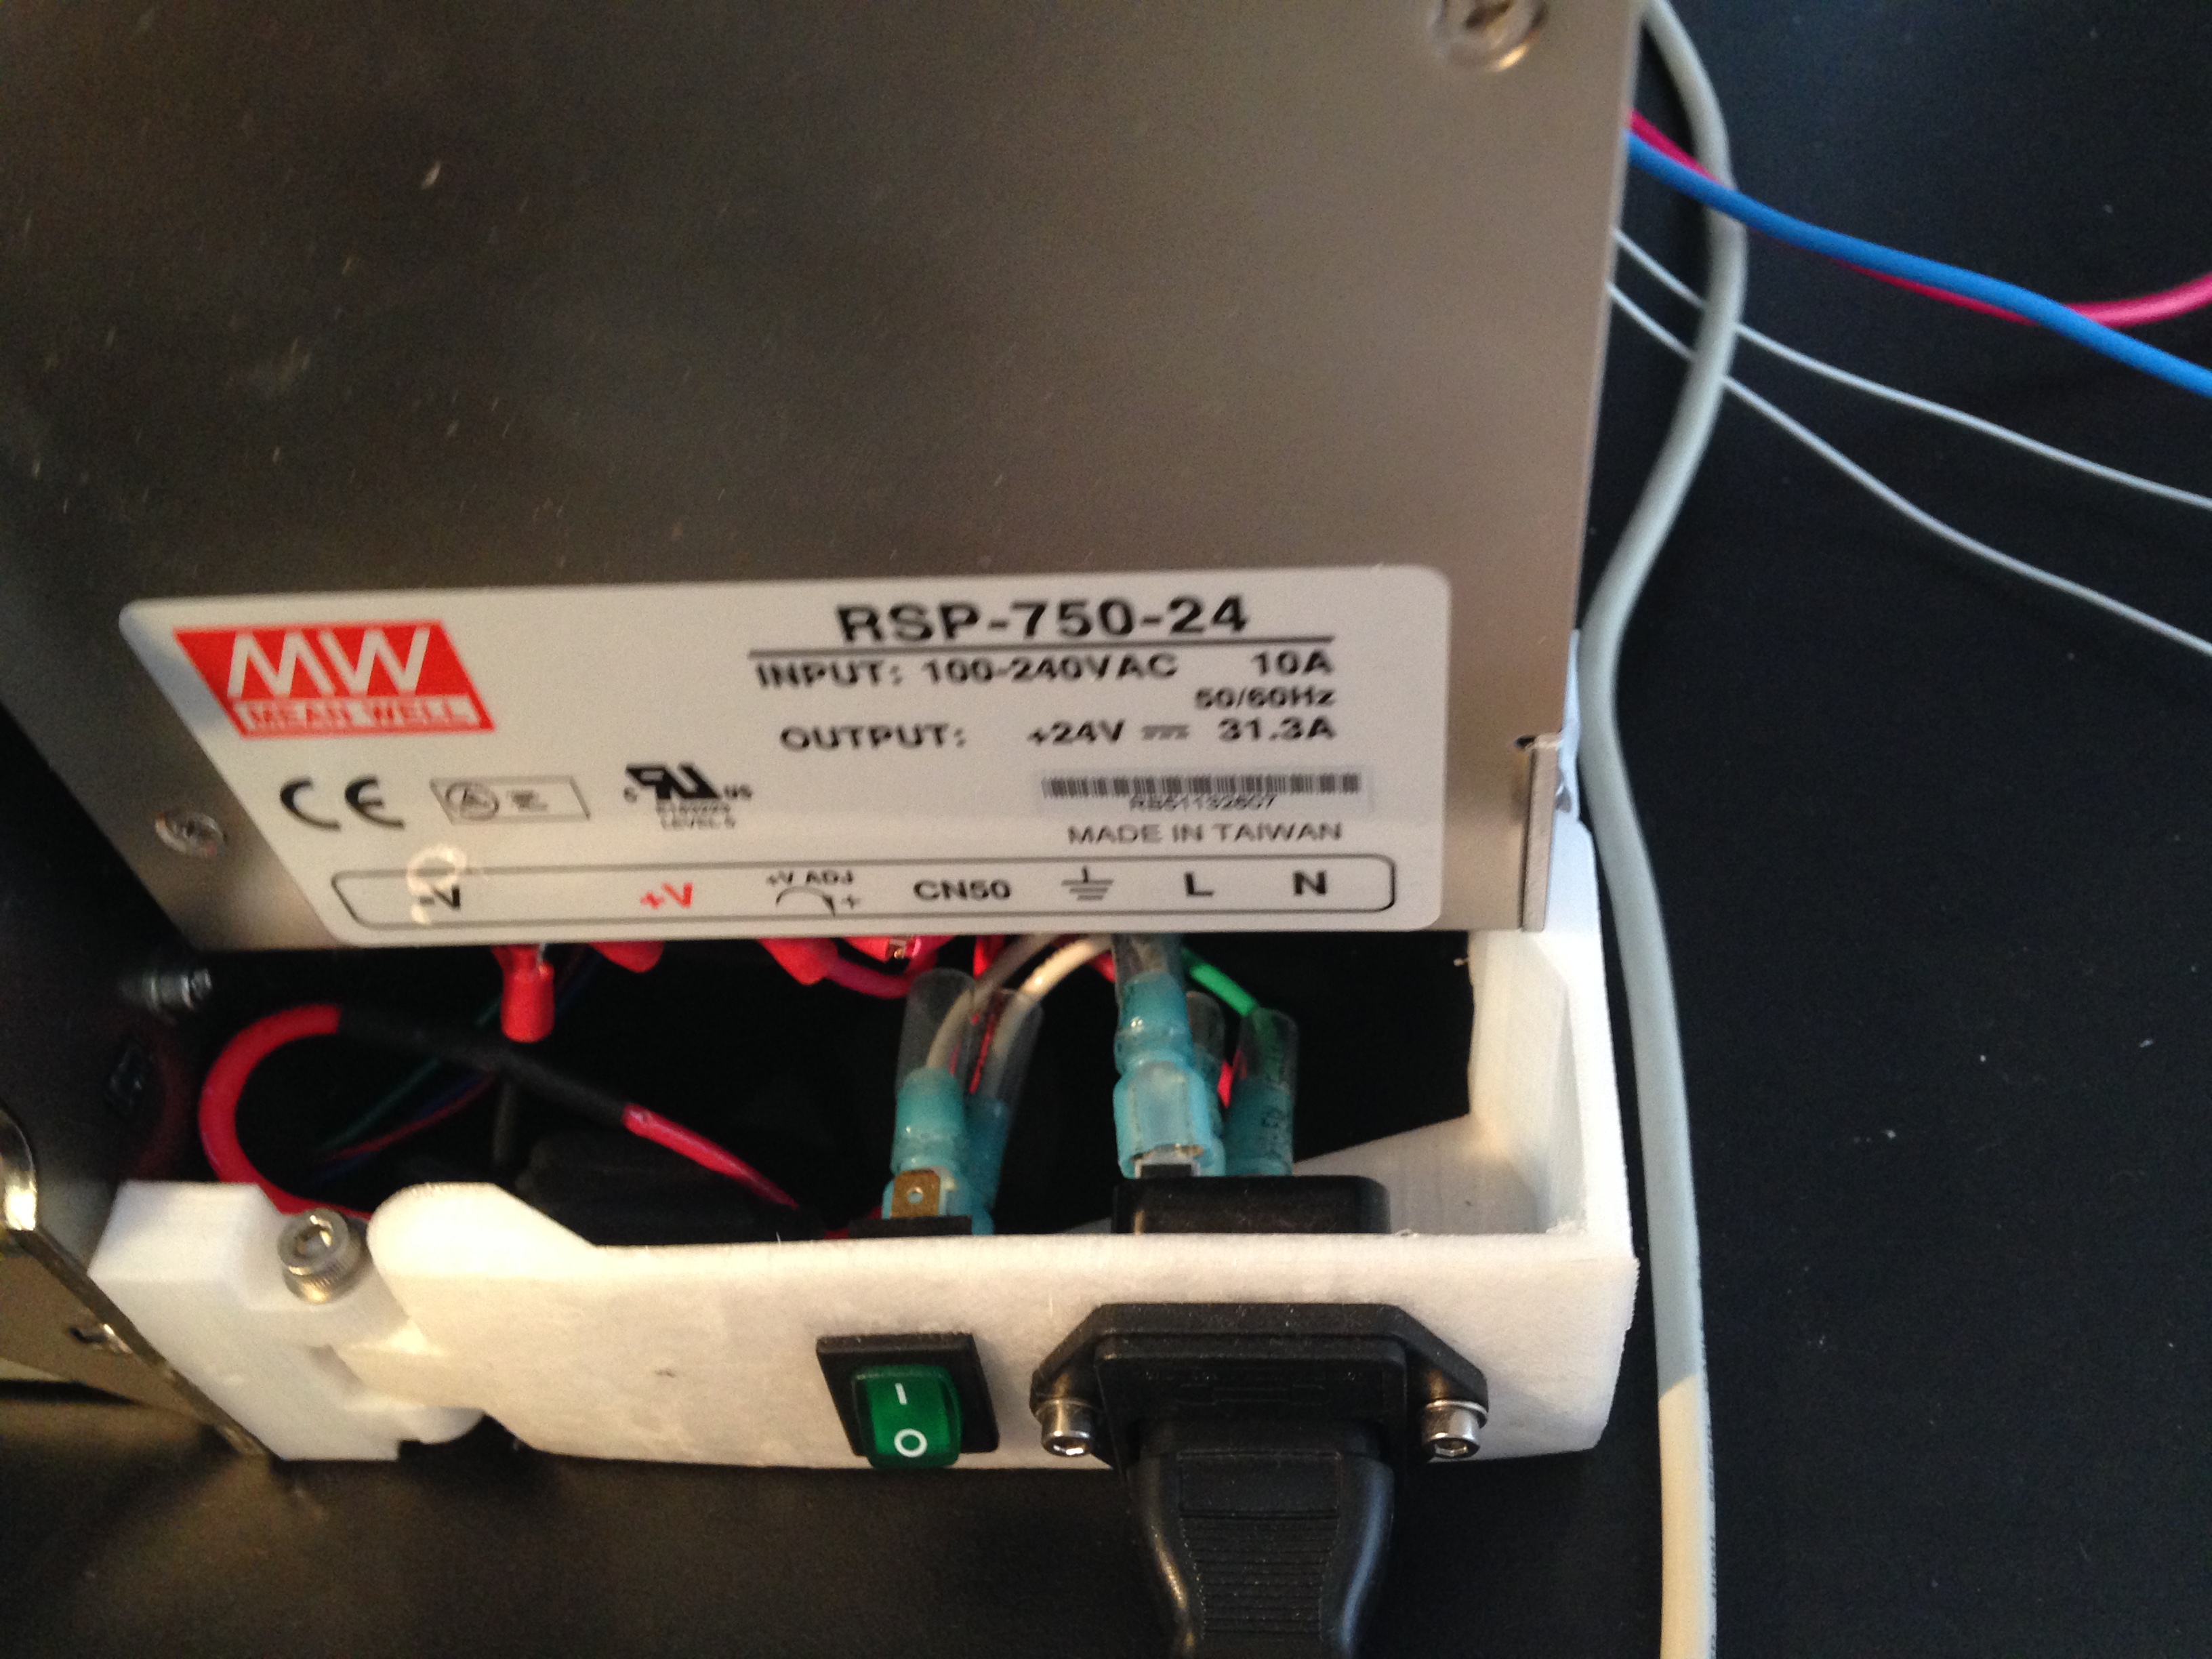
Arduino/Ramps 1.4 – Complete kit with LCD display for $34. The RAMPS 1.4 spec uses FETs with on resistance that is pretty high. You will want to replace those powering the bed and hot end and replace them with ones with lower on resistance or you will burn them up. I blew the ones that shipped with this board. Go with either the IRLB8743pbf (3.2 mOhm on) or even better the IRLB3034PBF (1.6 mOhm on). Here is a reprap post about using radioshack fets before those arrived. Radioshack fets have high on resistance. This means if you have a low resistance bed, like I did, they will burn up. I also thermal epoxy a small heat sink to the IRLB3034PBF to help with cooling. Diode and 1 polyfuse needs to be removed from ramps if your going to use a 24 V power supply like I am.
Heated Bed – The one I got and am using from Aliexpress has 1.6 Ohm resistance on the 24 Volt terminals. Your millage may vary but if your resistance is this low you will need a power supply with more wattage or an inline resistor which will require cooling.
24 V Power Supply – This was the 400 watt one I was initially using on this build.I needed more wattage because of the low resistance heated bed so I upgraded to a MeanWell RSP-750-24. I tried ordering a 700 watt PSU from aliexpress first but it was out of spec and couldn’t handle the current load of the bed. It’s output voltage would go down to 20 Volts while the mean welll I upgraded stays right at 24 Volts.
DRV8825 motor drivers – I would rather hav/e 32 microsteps than 16 and the current sensing resistor is a more consistant value on the DRV8825s. I’ve ordered these from aliexpress and these and these from amazon.com . I’ve fried a couple in installing and removing them. I would recommend over ordering and having extras on hand.
Y – Axis Components
I wanted the belt parallel to the axis which it isn’t with the normal design.Toolson on thingverse has posted upgrades to many of the P3Steel components.
Interface and beltensioner by Toolson
You also will need one GT2 pully.
X-Axis Components
I wanted an x-axis that had a belt tensioner and screw for easily adjusting the z-axis end stop. I choose the x motor mount and idler from hephestos.
X-axis motor mount. – EjeX-izquierda_mod.stl
X-Axis idler mount – EjeX_derecha.stl
I modified the belt tensioner that fits into the idler holder so it can be tightened with just a driver. I posted that on thingverse here.
X – Carriage – I modified x-carriage I found on thingverse to fit with the HE3D extruder mount. This carriage also uses the belt to lock itself in instead of needing to print teeth. Here is a link to my modified x-carriage.
X-Axis end stop – I used toolson’s design.
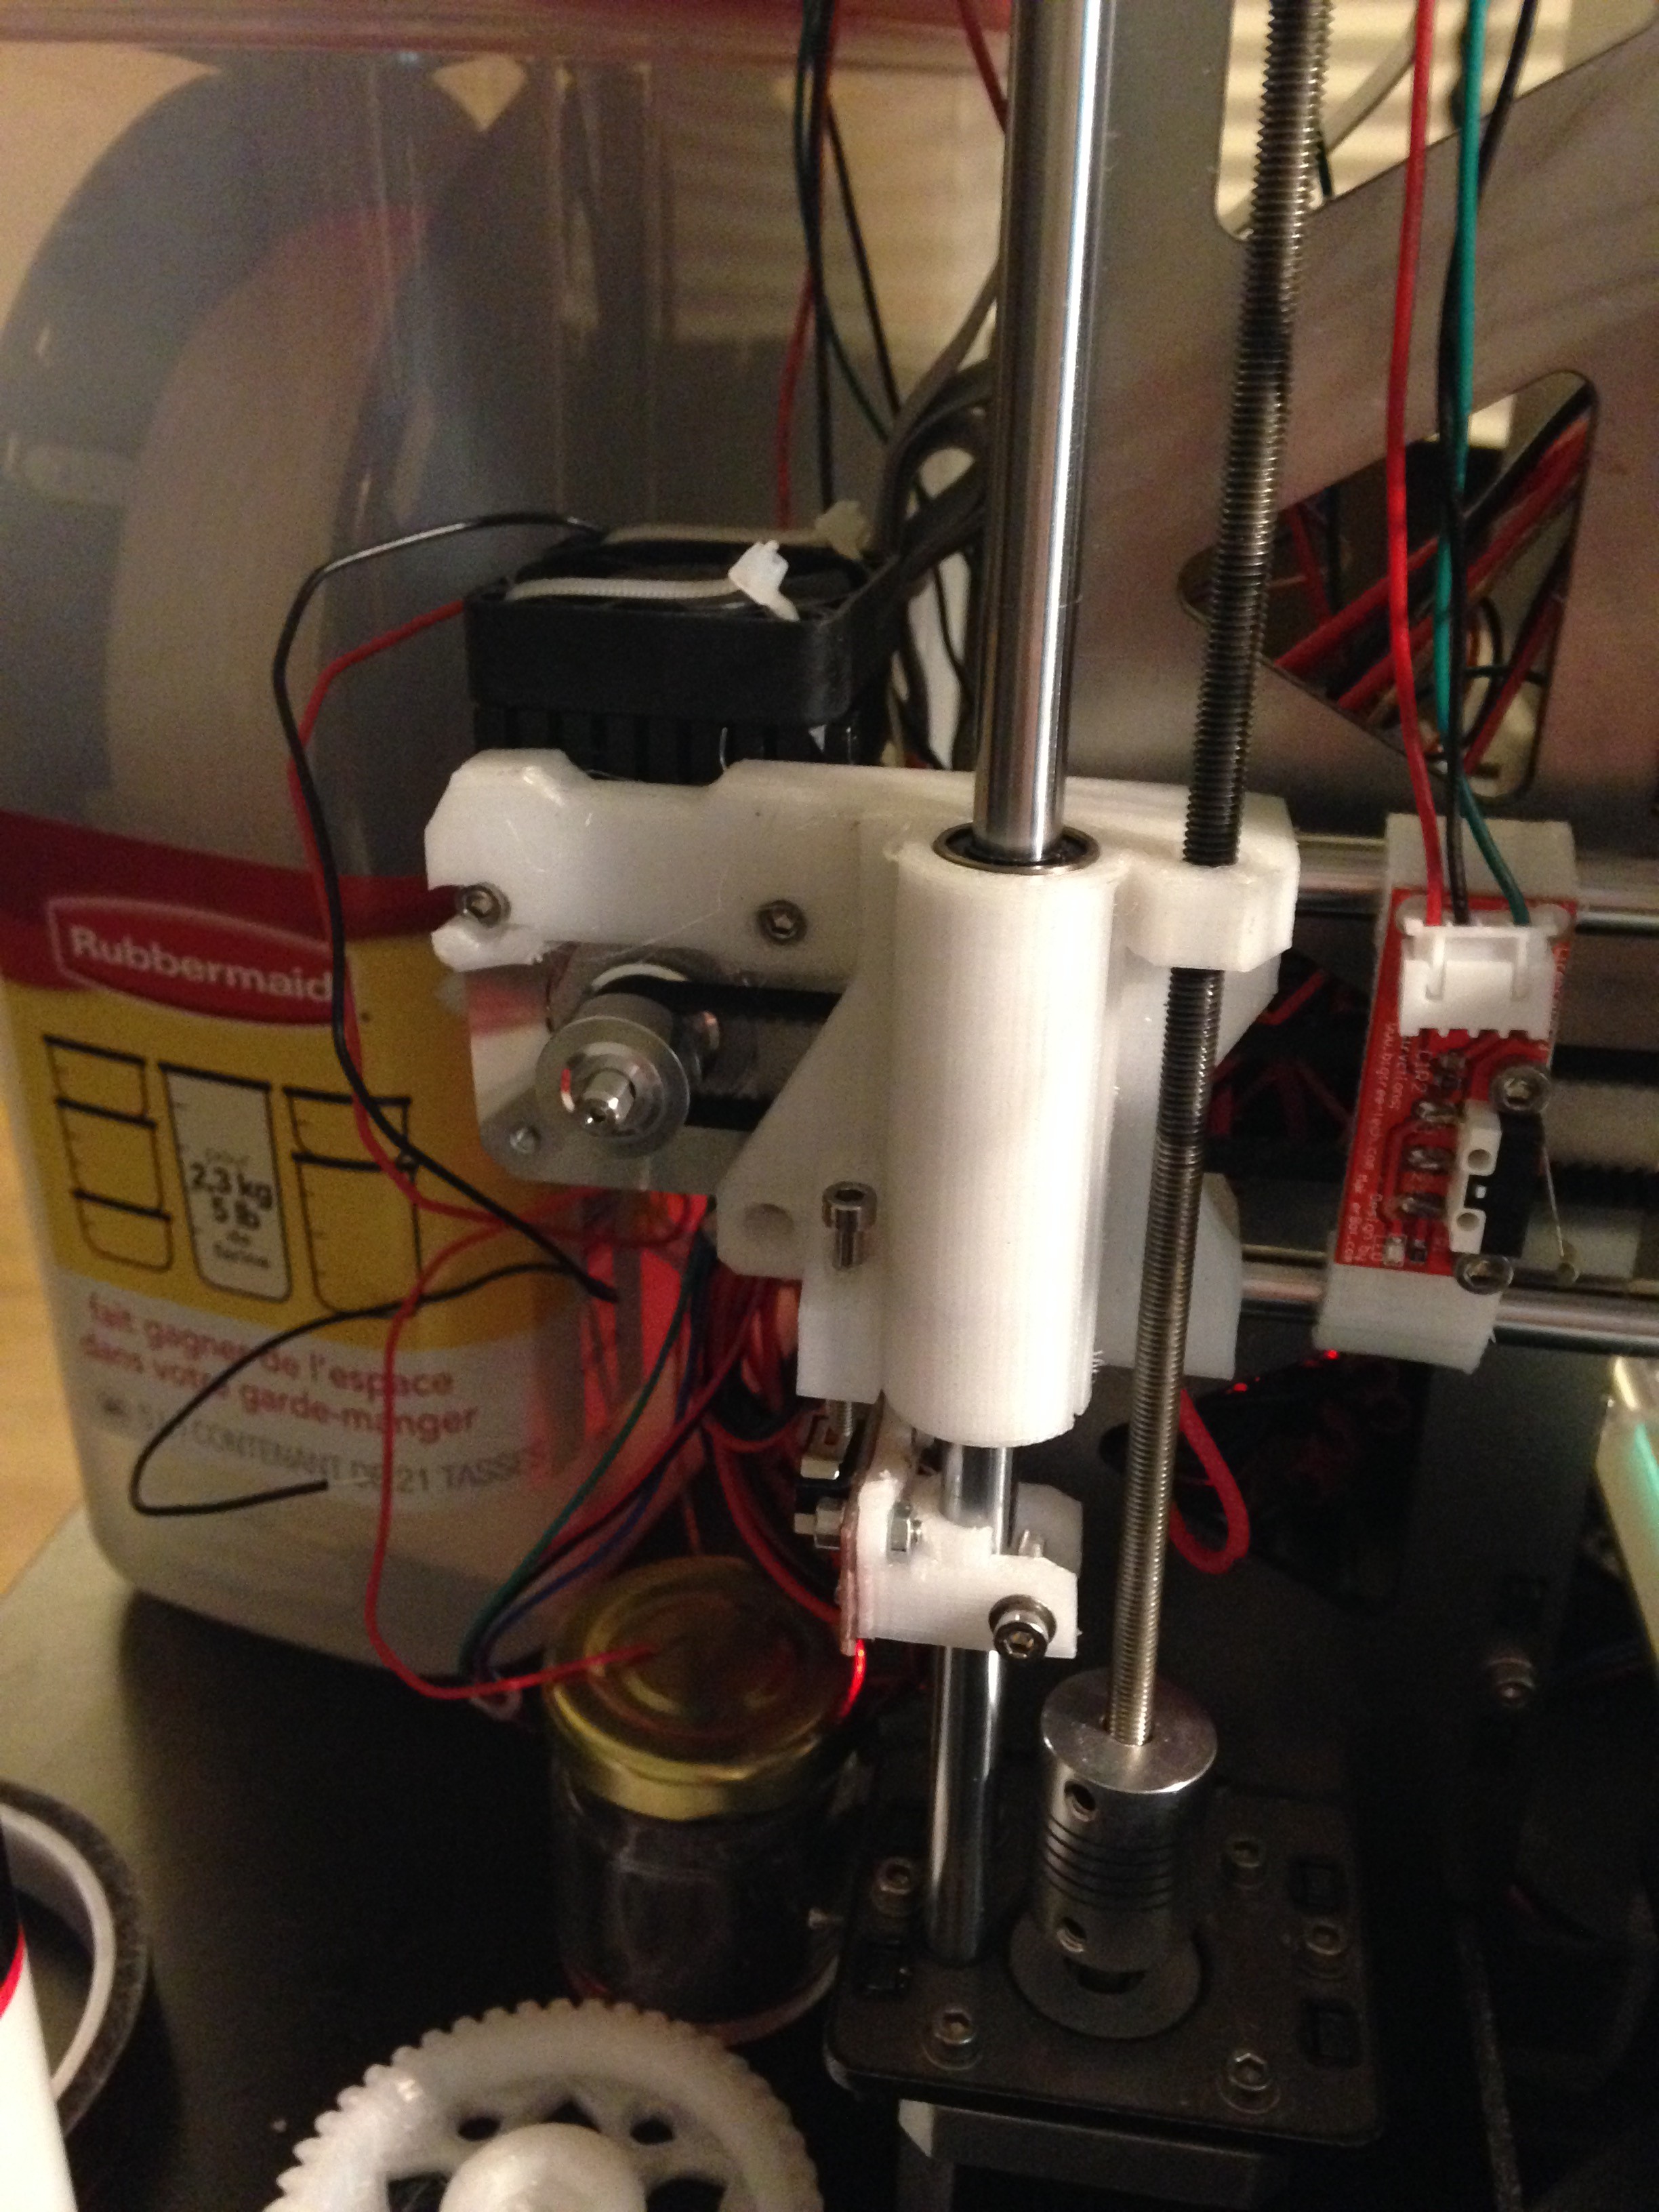
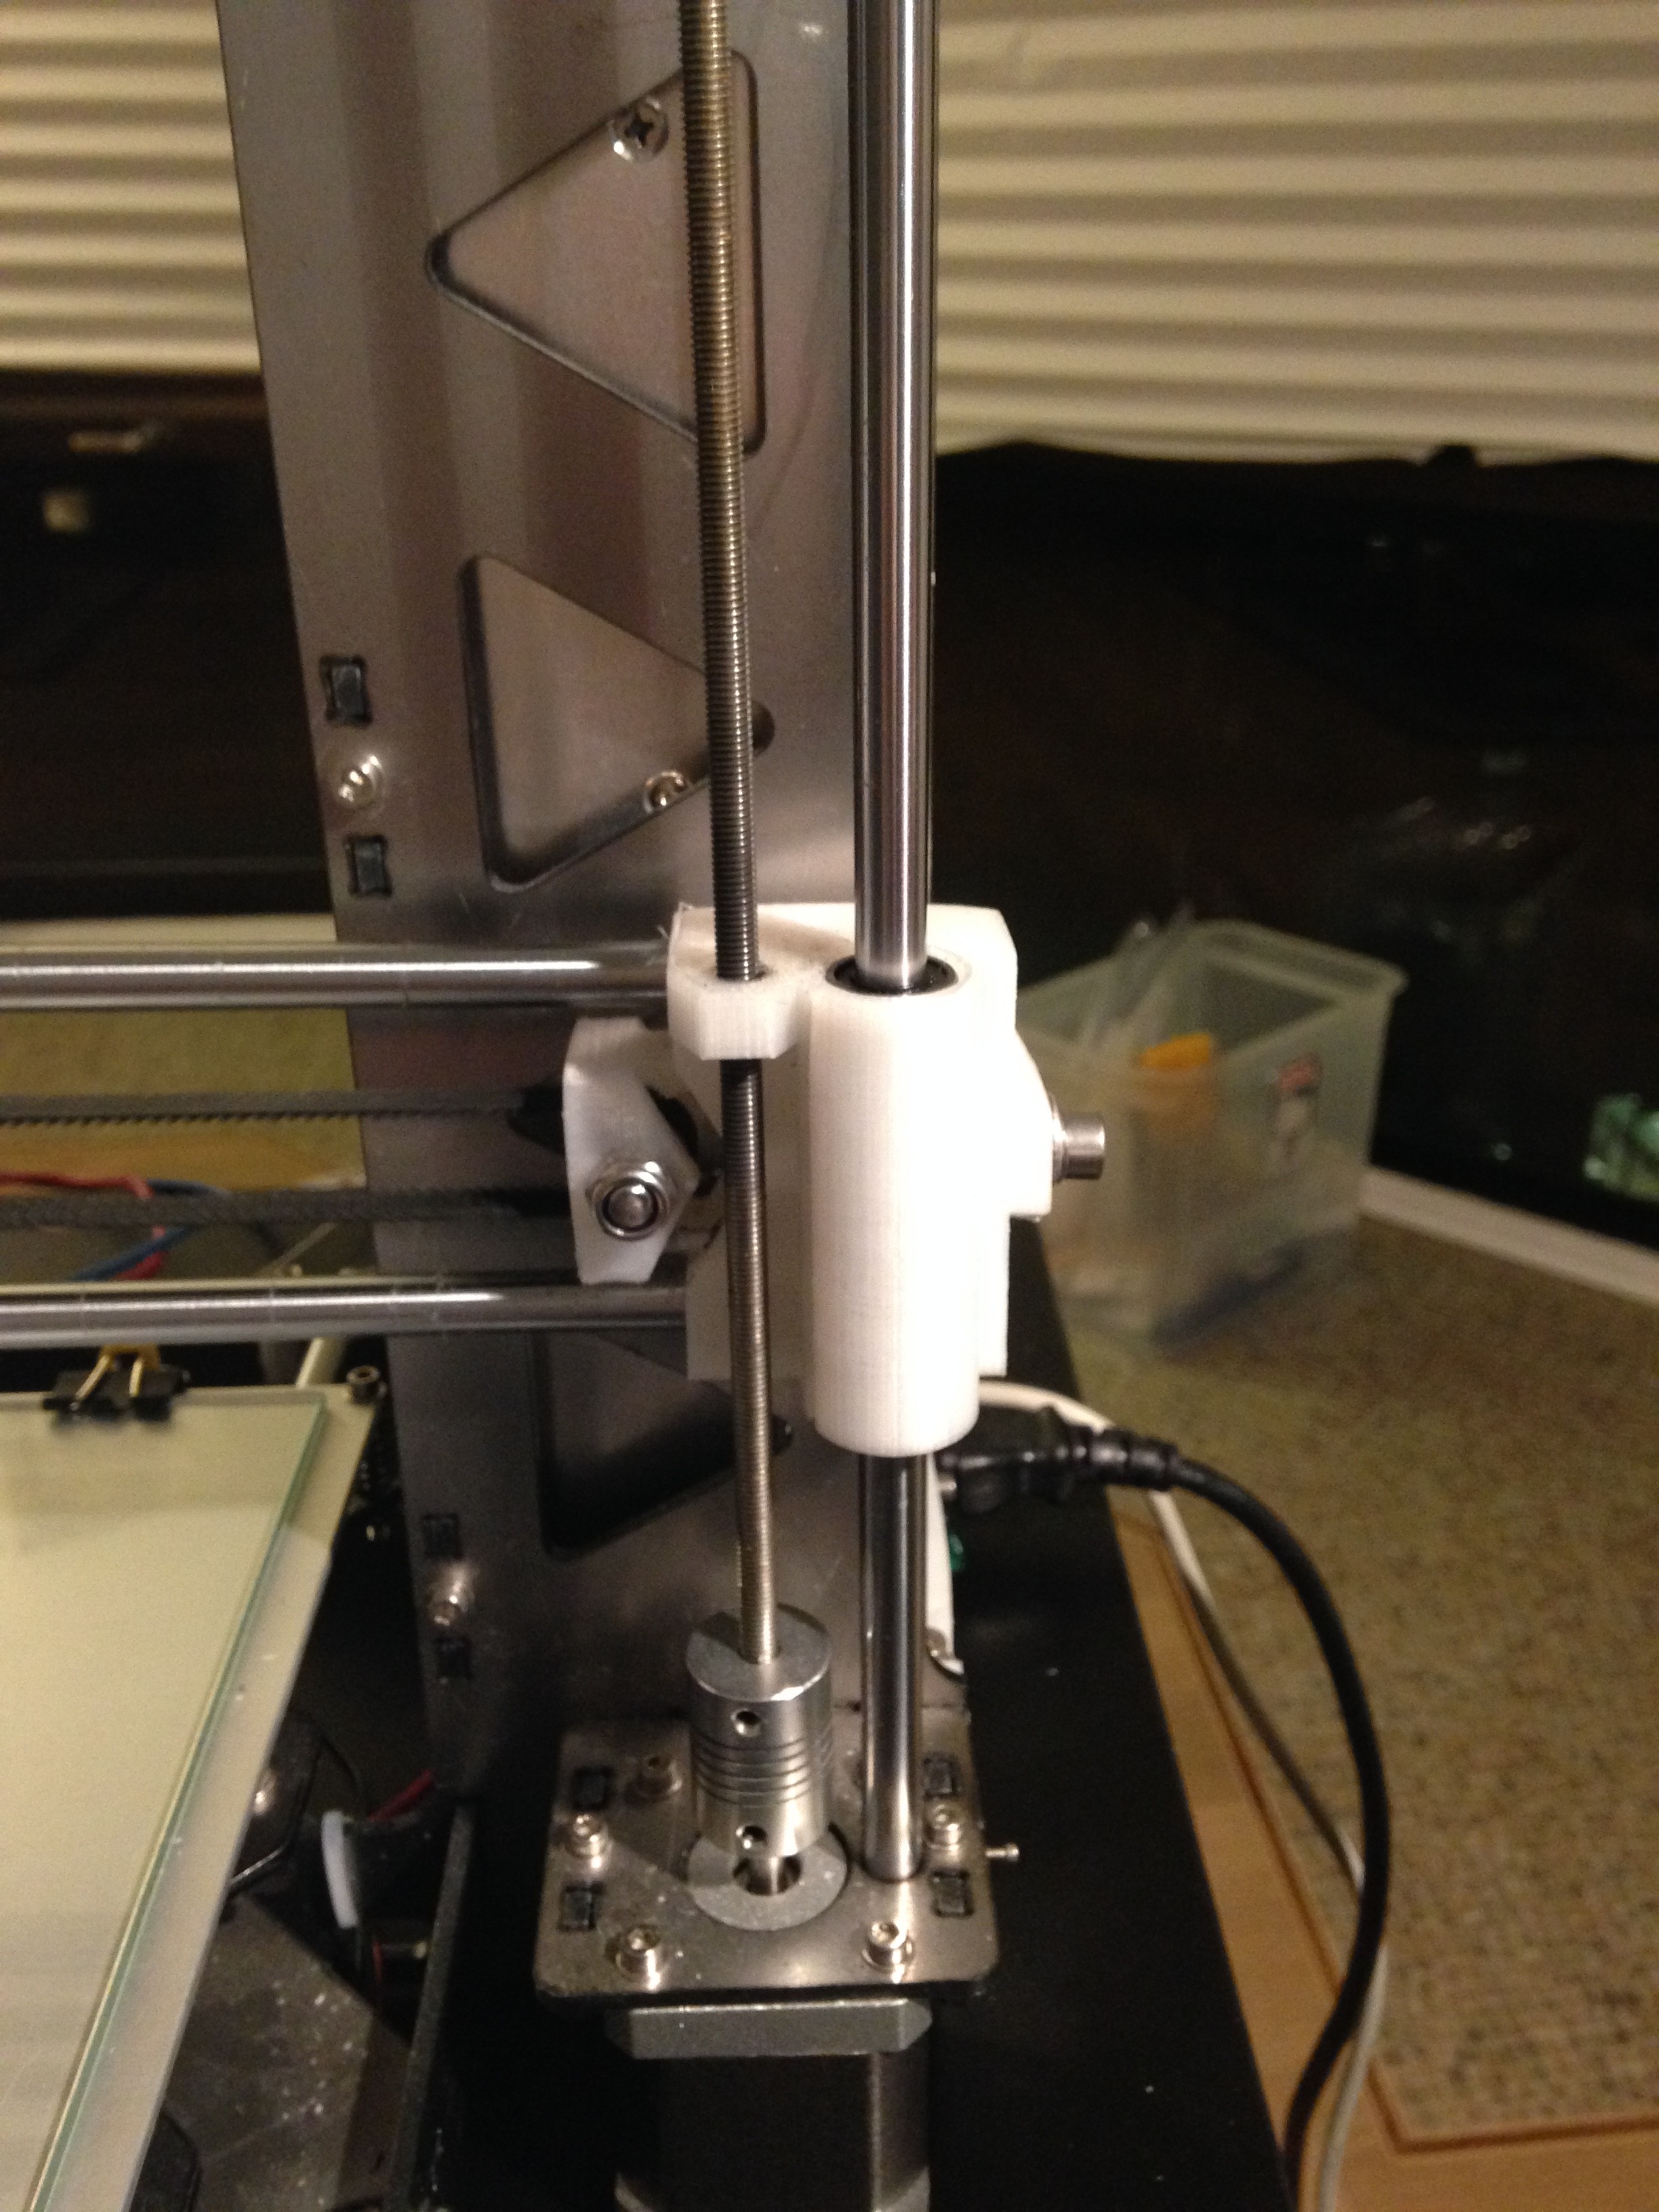
Z-Axis components
5 mm threaded rod – I purchased at AAA metric supply. A local metric screw supplier.
Z-Axis motor coupler – Purchased from aliexpress.
Toolson also posted these parts for putting tension into the z-axis which I printed.
2 M5 Nuts – Stainless steel purchased at AAA metric supply.
Z-Axis End Stop – Not sure where I got this from. I made some modifications to the stl files.
LCD Screen
I 3D printed the reprap discount full smart graphic controller box posted by professional 3D on thingverse. – Link Here
I modified the mounting bracket to fit on holes cut above the build plate. I posted those modifications on thingverse here.
Arduino Ramps Mounting Bracket
I designed a mounting bracket for mounting the arduino/Ramps to the modified P3Steel Screw holders. I haven’t posted this on thingverse yet but here they are. There are 3 files in the .zip. One for the bracket, one for the connector piece and one for the 40 mm fan mount.
Electronics Switch and Mounting box
I designed a bracket for the switch and AC input. There are 2 stl files are here. Two prints of the hindge connector are needed.
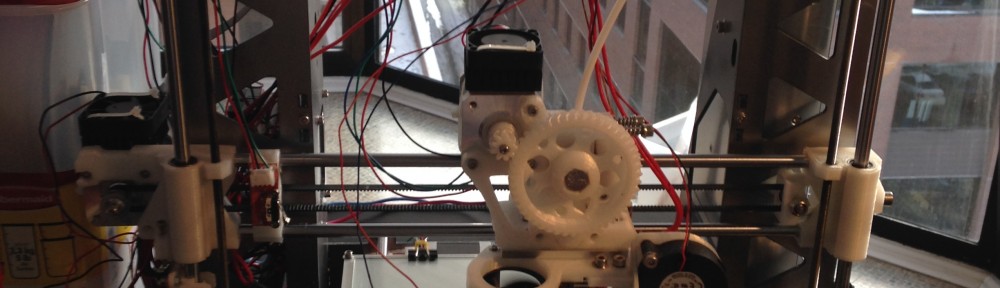
Extruder
I am using the Greg’s Wade’s Ultimate for the extruder. I have modified it to add an additonal hole and accommodate a PTFE insert guide tube. I still need to post that on thingverse.
I got the hob bolt from Lulzbot.$10
You will need some 608zz too. They cost $10 per piece at ace hardware or you can get 10 of them for $6 off amazon.com .
Hot End
Started with using a Hexagon Hot End. Around March 1st, 2016 I switched to a Prometheus V2. I’ll have to update with how that goes.